Hello, welcome to the HV guide. I’m your host Zackey_TNT and this guide will assume that you have fully read and understood all chapters of the SV guide found here
HVs are very simple to construct, as they have few weapons and 2 less directions then SVs. None the less, there are some differences from SV design that we will discuss.
Chapter 1. HV Design.
Subsection 1. System Design.
The difference between SV and HV design is quite slim at times, as both craft have extremely similar requirements. Overall though, HVs differ from SVs by: having automatic weapons that target for you, having only 4 directions of thrust to move (down is disabled and up is covered by your HV engines), and being 5K blocks.
This means that HVs are usually going to win one on one against an SV, due to these advantages. Durability is your main strength, when designing an HV, this must be a priority!
So firstly, we’ll discuss Grouped vs Clustered for HVs. A lot of designers will agree that for HVs, grouped tends to be more advantageous because it’s easier to protect with armor, and HVs don’t require as many redundant systems as SVs. Additionally, the smaller size of the overall craft decreases RCS block requirements, which are the main problem with HVs. Smaller frame = better rotation.
Next, let’s discuss Hover Engine placement. Usually, you’ll want the bulk of your hover engines centralized in the rear of your craft, as the systems section tends to be the heaviest. These are usually placed on the extremities of the craft like so:
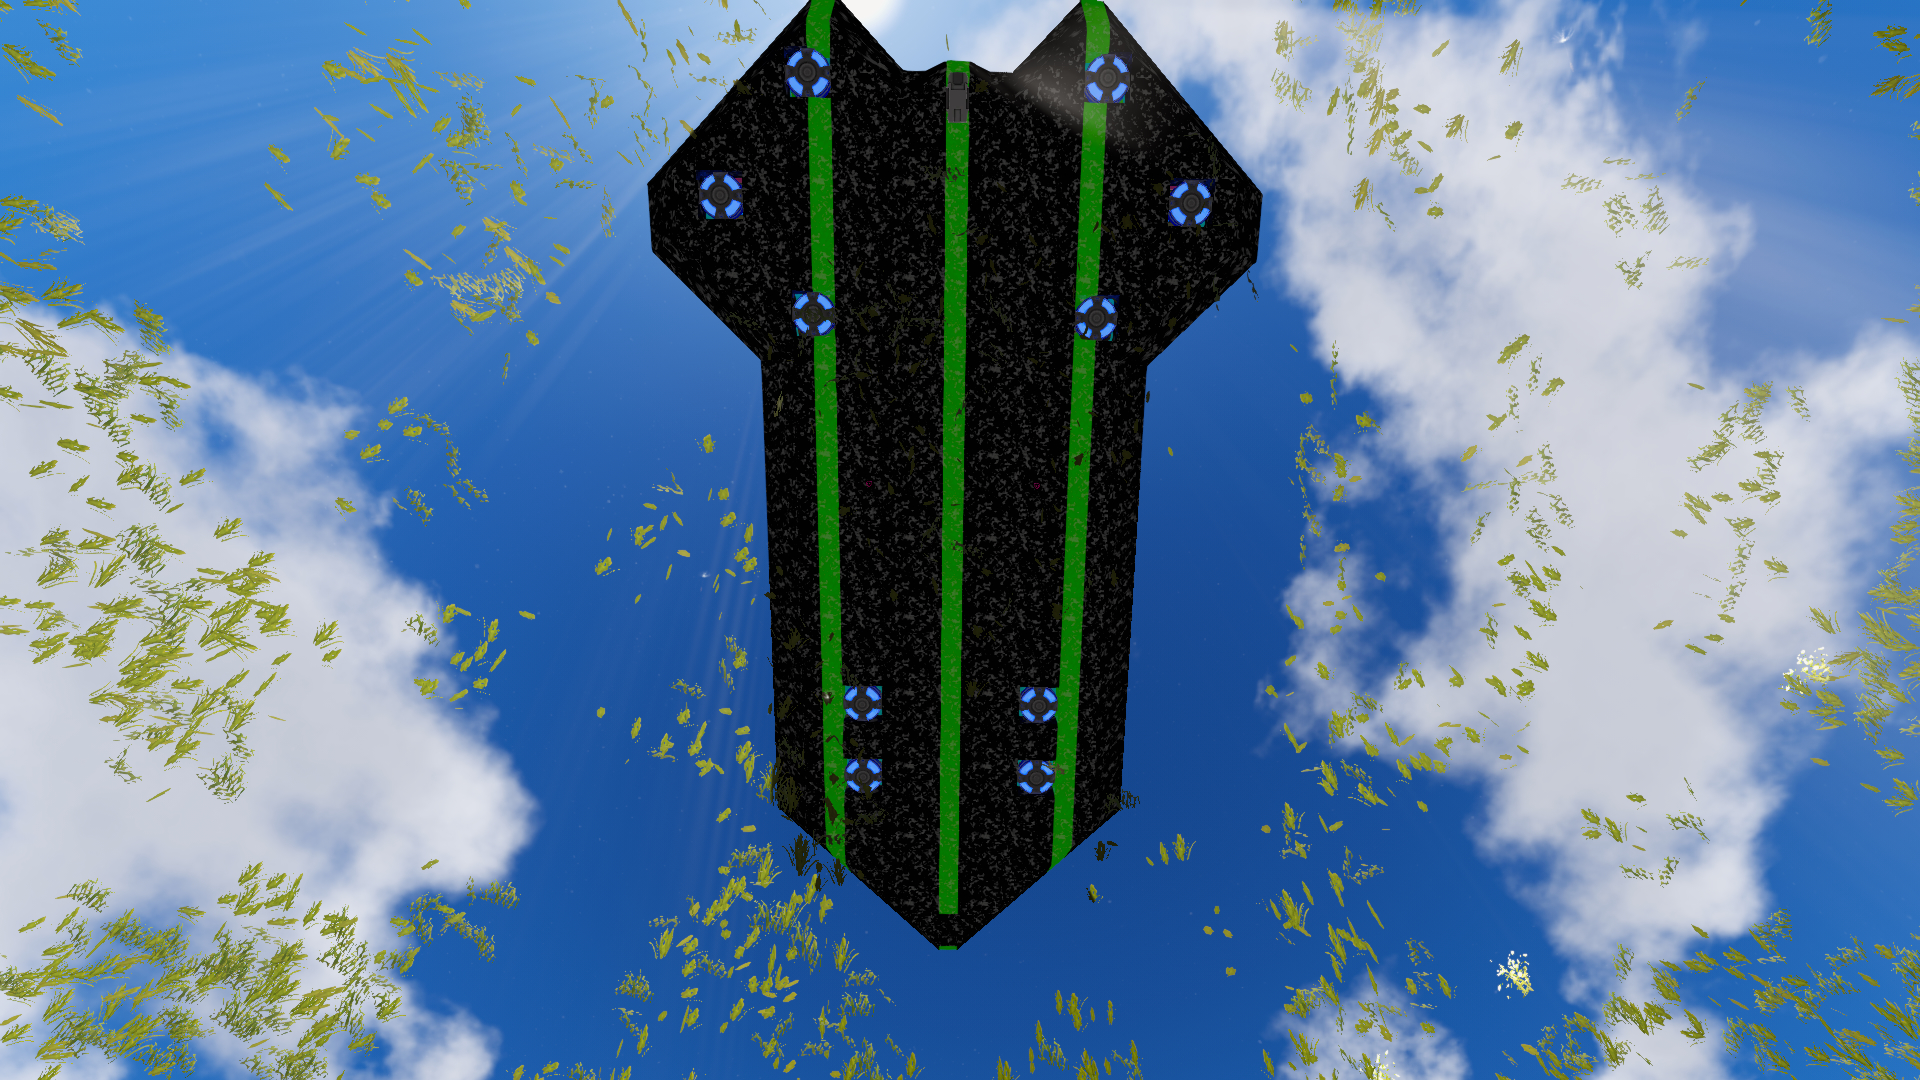
You don’t need many of these, as you can see by the screenshot. Each one will provide an ample amount of up thrust, and as HV engines behave more like a repulsing magnet then a thruster, you can even go lower then this.
Some designers “doublestack” HV engines internally, which increases their “rebound” and improves climbing. The downside is that this consumes a lot of devices and can be more problematic to protect. It’s still up for debate if this is worth the trade, so try it out for yourself!
And finally, onto thrusters. You have two realistic choices when it comes to HV design, Thrusters and Jets. Let’s discuss the pros and cons:
Thrusters:
+Smaller.
+Weighs less.
+Can be better TWR.
+Consumes less power.
+Can be more durable, if set up correctly (Due to higher hitpoint per bounding box).
-Much more difficult to work with.
-Consumes more devices.
-Difficult to design with Symmetrical layouts.
-System Mixing is more difficult.
Jets:
+Easier to work with.
+Better Thrust to Device ratio.
+Can transfer many aspects of SV design straight into HVs due to same size.
+Symmetrical layouts are easier.
+System Mixing is the same as on SVs, and is easier in general.
+More individual health, leading to less device loss over time.
-Bigger.
-Weighs more.
-Worse TWR.
-Consumes more power.
-Overall durability is debated.
I personally prefer Jets but your mileage may vary.
Sidenote:
Use Carbon Composite Block S on the bottom of your tank. Since this is rarely exposed for long, their decreased health isn’t much of a problem, and they can still take one hit per block before being removed. This comes with a massive weight reduction and thus increases speed. Just make sure not to replace steel with it underneath your cockpit, around your hover engines, and your turret decoy!
Subsection 2. Lagshot Design.
Lagshot design on HVs tends to be a lot more relaxed due to HVs having less of them in general. This is because lasers aren’t very effective against HVs due to combat steel. Still, you should provide lagshot defenses in your core area, around your cockpit and on your core. In terms of cockpit design, it’s identical to SVs. Use the 1x3x1 cockpit and shutter blocks. Again, you should reference lagshots from the SV guide.
Also, try using RCS as lagshot, usually on HVs you’ll have a lot of them, just make sure to have backups!
Chapter 2. Turret Placement & Defense.
Subsection 1. Defense.
First, let’s talk armor. There are three main layout types.
Hardened Steel:
These HVs use entirely Hardened Steel which has a health of 200 and is lighter then combat steel. Usually placed at 5k blocks, these tanks are designed for Anti-SV. The advantage of these is that it’s lighter, faster, easier to hit 5k blocks with, and usually cheaper then combat steel. The disadvantage is durability.
Composite:
This is where you layer every 2nd block with combat steel. It’s a mixed type that increases resistances to all weapons at the cost of weight and cost. It’s a nice in-between option for armor layout. It also comes with the added benefit of forcing players to swap between weapons to deal with the different layers.
Here’s an example:
Combat Steel:
This is when the entire craft is made up of combat steel. It’s costly, heavier, and usually not possible to achieve 5k blocks on with a reasonable level of thrust remaining. You commonly see 3k-4k being the norm with HVs like this. The advantage is that they are smaller physically, and are more durable.
I am personally a fan of Composite, but I rarely use only Hardened steel these days, except on elevated turrets.
Combat steel only builds are perfectly acceptable and are left to designer preference.
Let’s talk decoys. Firstly, realize that generators are still used as decoys just as they are with SVs. It’s recommended to place a few of them in the nose of your tank so that other turrets fire at them. What’s really difference about HVs though is that most HVs will give up a turret to be a decoy. This is because other HVs sometimes swap to only turrets, in which case, all the damage starts going to your turrets instead of your hull. I usually use plasma turrets for this role as they tend to be the least effective turret in HVs, but are still incredibly useful. Note that gatling turrets are not valid decoys, because they are not targetted!
If you can manage it in your tight class size budget, consider adding lagshot defense to this one turret, as it will prevent it from being damaged before the armor is breached.
I recommend placing a single turret in your hull on most builds, except for elevated, which we will cover in subsection 2.
Subsection 2. Turrets & Elevated Turrets.
Firstly, let’s cover a basic load-out for a standard HV. All turrets are used, even Gatlings! Try to get your turrets as close to your crosshair as possible, as this increases the chance that they will have LoS.
I like to place my plasma turrets flat in the HV, as they are mostly used against HVs and Bases. I will put one or two on the side, because plasma can dig terrain around bases with claimblocks.
I like to put my rocket turrets in little slots that allow them to target SVs, as they track targets very well.
Example:
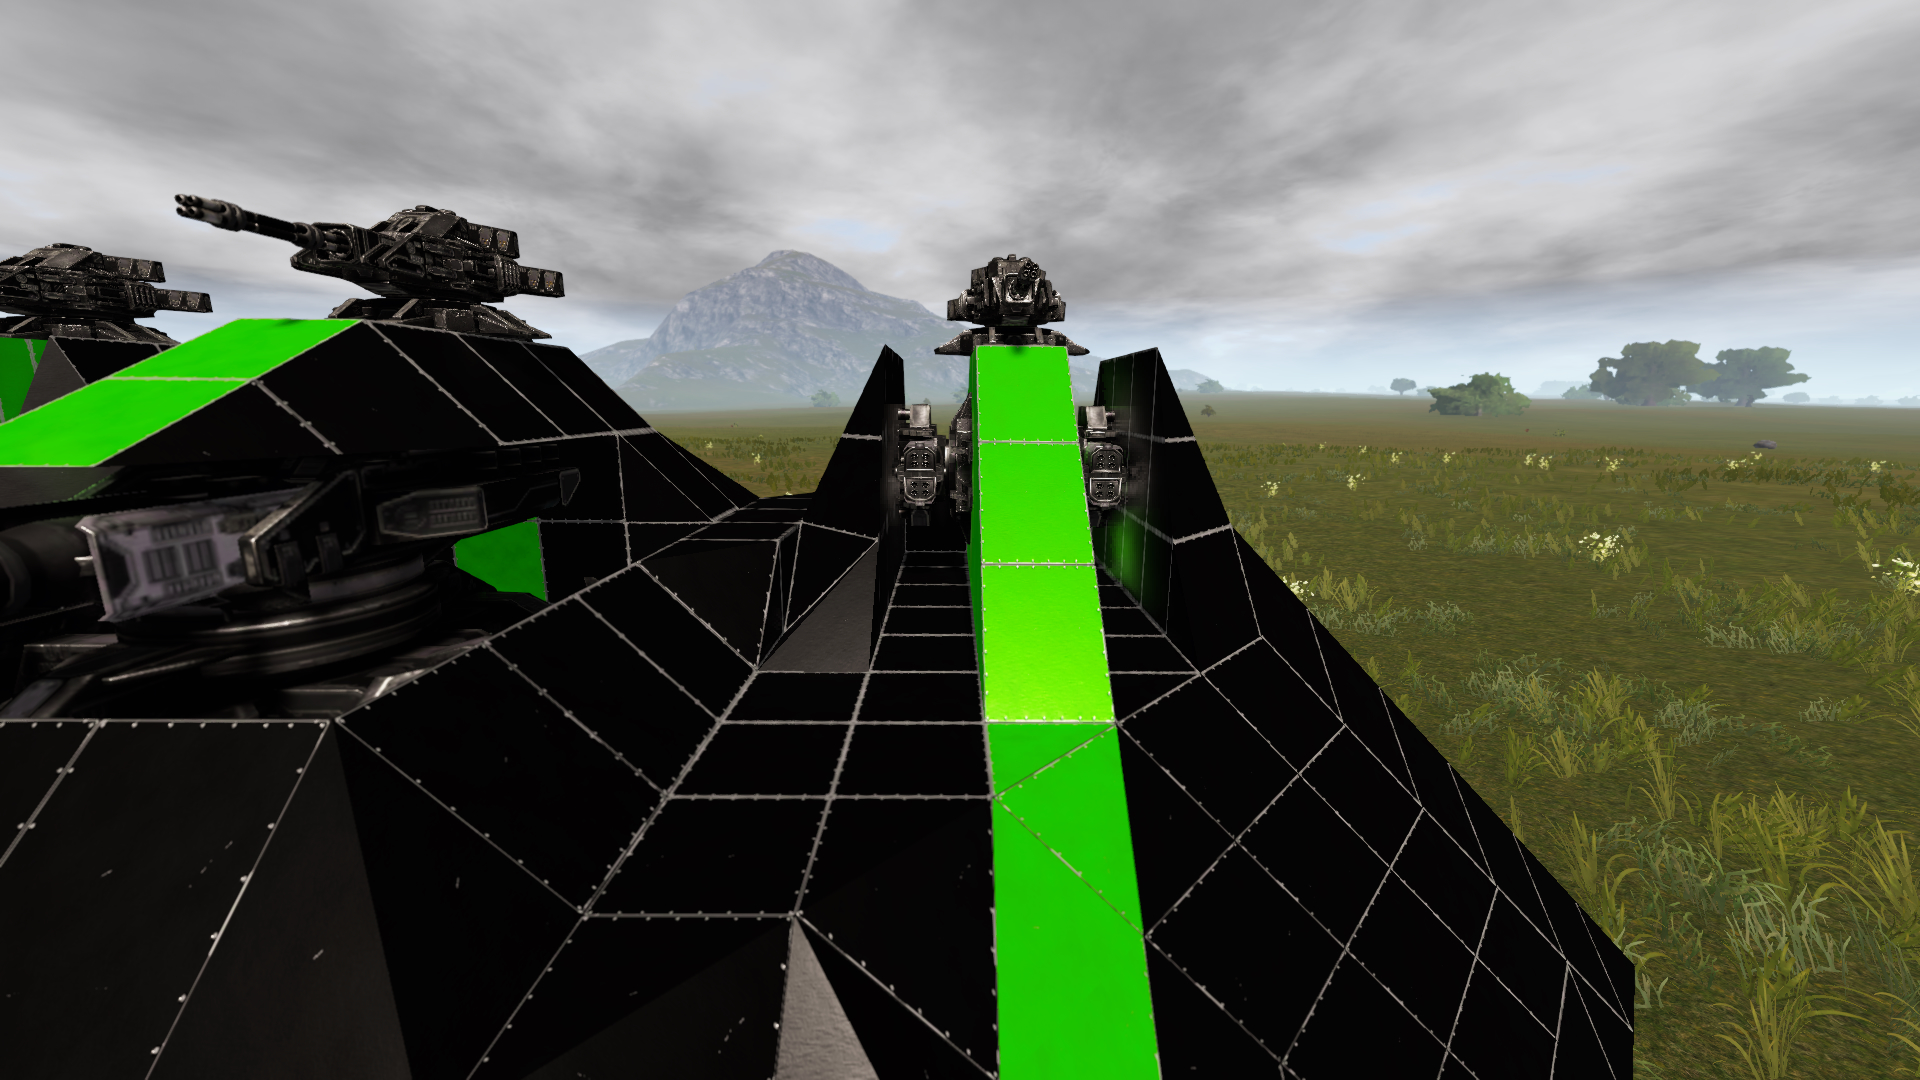
Also seen is my placement of Gatlings, I use them as turret caps to protect my primary turrets. They are also able to fire as usual, which can help.
Example:
Since these turrets have quite a bit of health on HWS, they can provide effective protection for the turret below it. And, they don’t block fire from the bottom, shots will “phase” through it because of a lackluster hitbox!
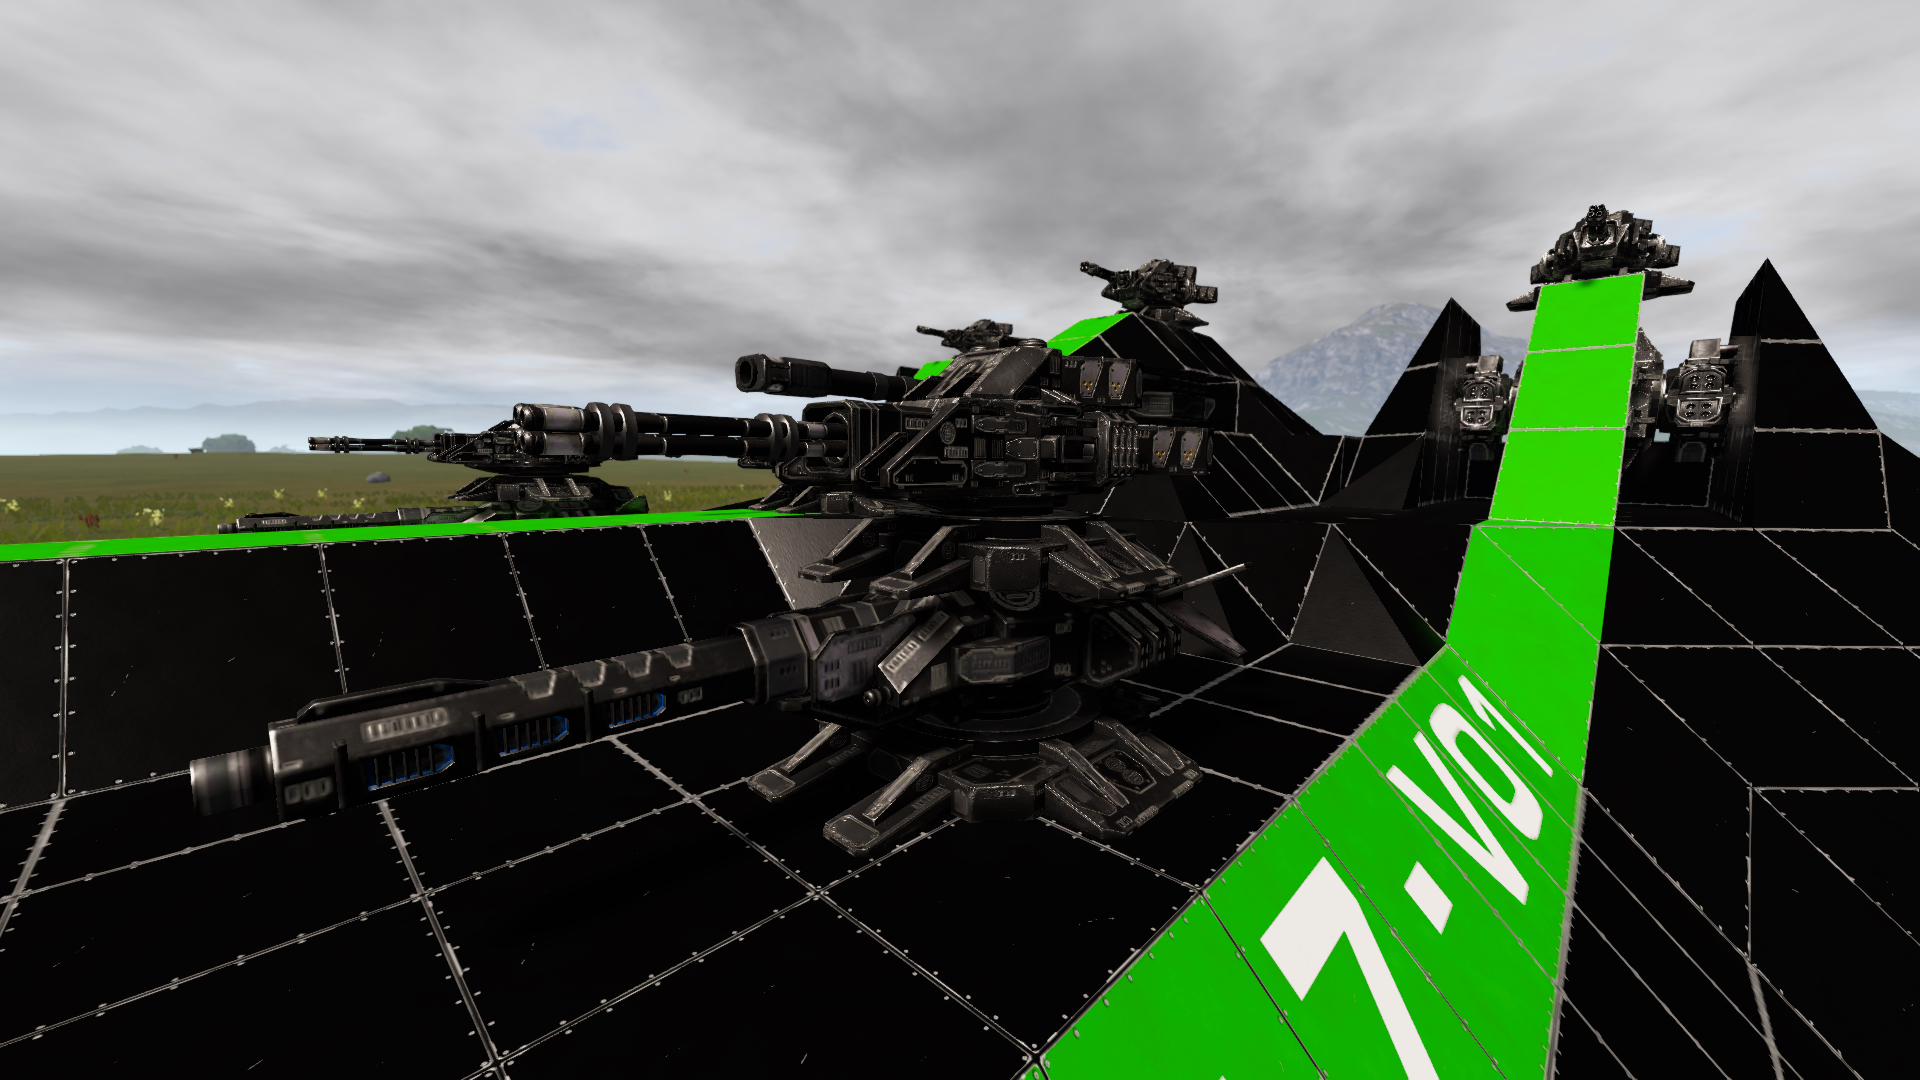
Finally, I place my artillery turret smack bang in the middle. This allows me to focus my protection on it and “twitch” with it to fire off shots against distant targets.
Now, let’s discuss elevated turrets.
What are elevated turrets? They are turrets that have been placed in pillars far above the vehicle itself, they are mostly used against bases and SVs, and because you can hide the entire hull of your vehicle behind a bit of terrain and still have turrets fire off at bases, they are very effective in both these roles
Here’s an example:
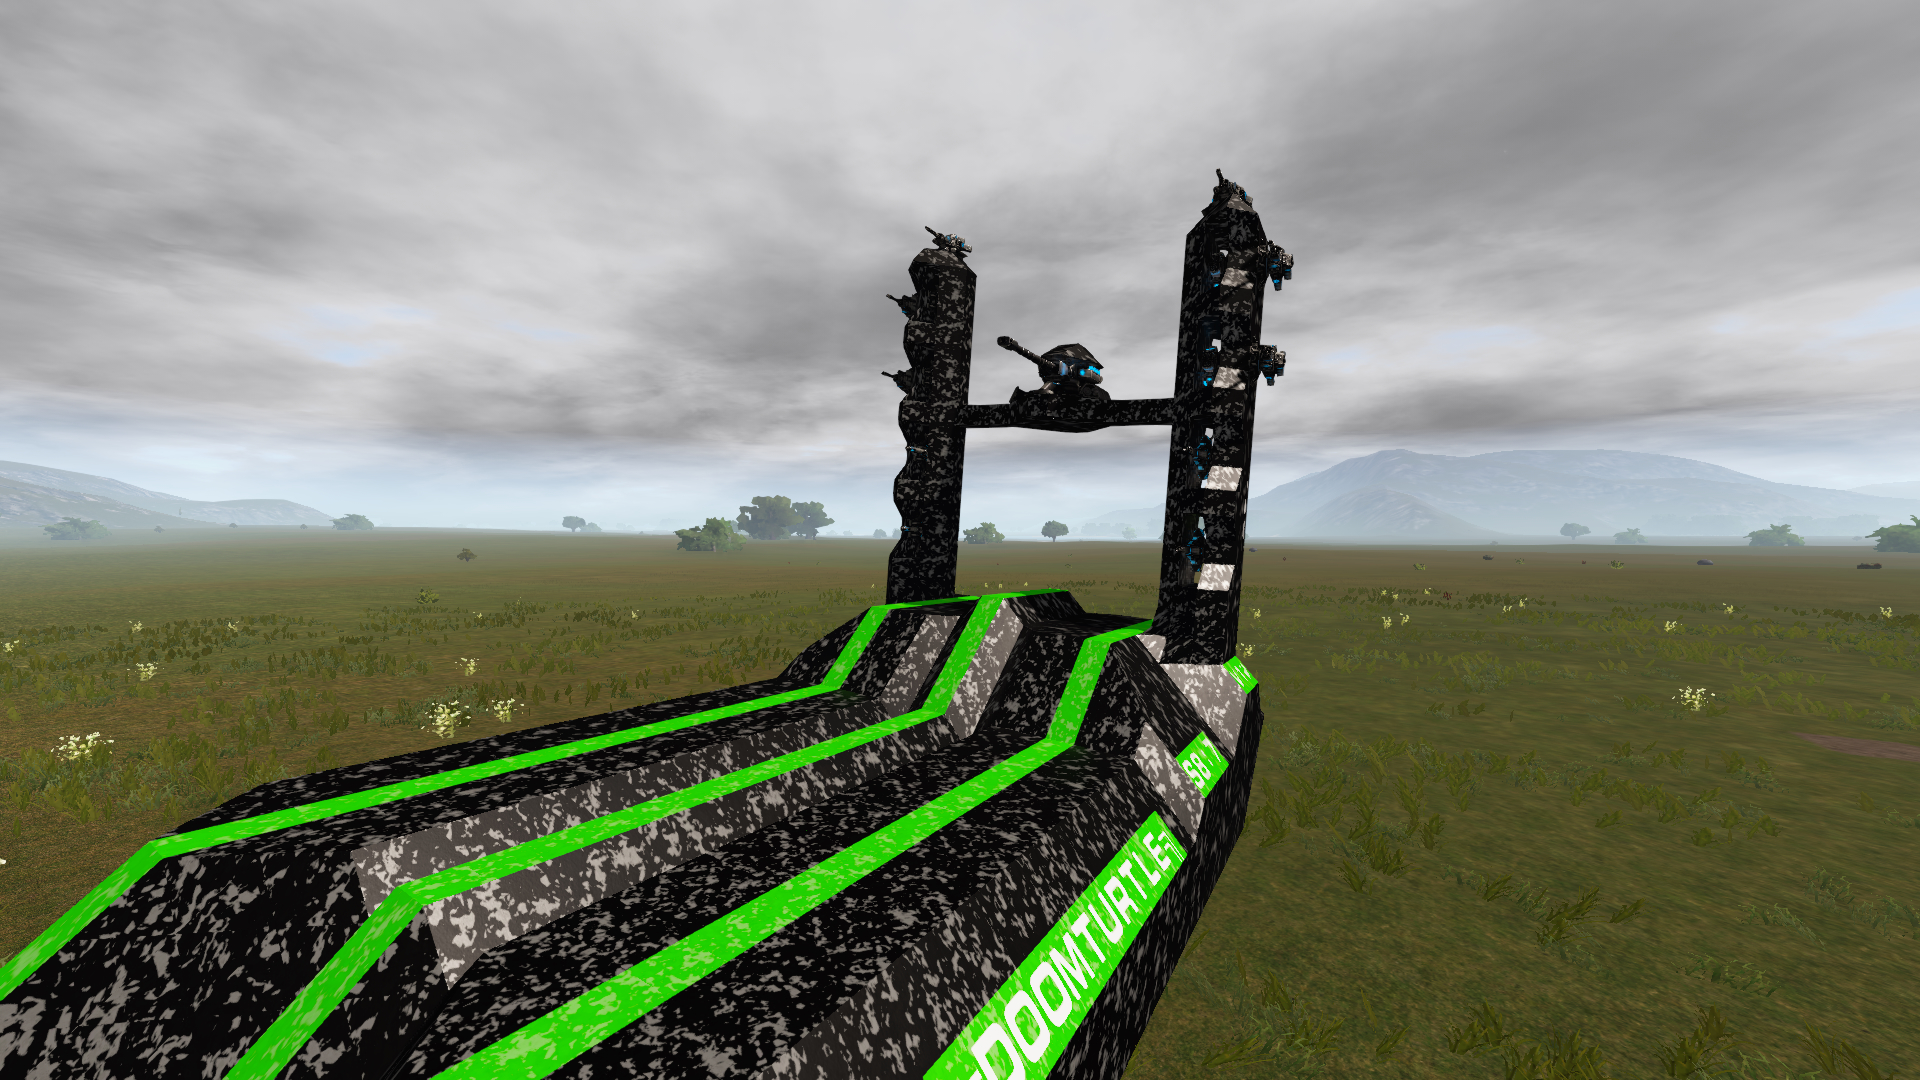
Elevated turrets often end up making the vehicle more durable then their usual counterparts, as all the fire is drawn up into the pillars and absorbed by the turrets instead of your vital systems! They also allow you to strip an entire base on your own just by using cover, since turrets will get “stuck” on targeting your generator decoys below the line of sight.
Elevated turrets have a very big con to them however. They are extremely bad for triangle count and class size. This makes it difficult to have a lot of devices, thus a lot of jets, thus a lot of maneuverability is lost. Not to mention the obvious RCS increase as a result of increased bounding box size.
If done correctly however, they are very effective!