Written by Impulse of DS3, Compiled by Cyanfire of ABN.
S14 NA/EU, Pre-HWS+
This is a supplementary guide to the primary PvP Community guide:
Welcome to the SV building, tips and tricks section of the ABN/DS3 joint PvP guide. Today we will be discussing several topics regarding weapon loadouts, armor types, lag shots and most importantly, device/thruster placement. Our current builds aim to be between 2800 and 4000 blocks and at least 65 m/s in all directions with at least 60 yaw and 90 pitch and roll. The name of the game now is speed, maneuverability and shields. Until that changes, we do not anticipate the meta undergoing drastic revisions.
Weapon Loadout
The first thing you want to do is review the EWS config referenced here. Get acclimated with the weapons and how they perform.
This guide will show you which weapons are more effective vs armor types and devices. A caveat that we have found after numerous fights and testing is that the Anti Matter weapons are bugged at the moment. We believe this is an Eleon issue versus an HWS config issue. Anti Matter weapons no longer do 12% damage to shields on a single volley if they all connect. They also do not perform the same amount of block and device damage as originally intended when they were initially implemented. Therefore, we do not run them at this time.
We currently run Pulse Lasers for shield depletion, rail guns for an additional 10% factor versus metal light, metal and metal hard. These will be Fuel Tanks, Generators, Manual Weapons, Thrusters, Shields, Pentaxid Tanks, Ammo Boxes etc. In addition, we also run Plasma Cannons as they are highly effective against Xeno (CV’s and bases equipped with Xeno blocks). However, the bread and butter for the SV weapon loadout are the Homing Rockets as they are homing and deal excessive DPS to metal light, metal, metal hard, hull, hull armored and hull combat.
We also will run at least one manual fire decoy to pull damage away from our manual weapons when targeted by bases and HVs. Another point we would like to make is that we highly recommend that SV pilots setup macros for their loadouts as all weapons firing at once will output maximum DPS if they all hit.
Armor Types
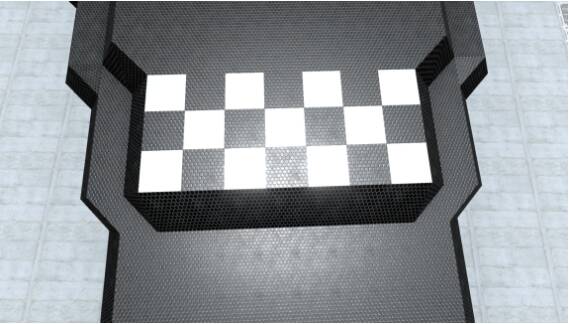
Best practice is to use an 80/20 or 90/10 ratio of Carbon to Hardened Steel blocks gives us the best combination of speed, maneuverability and defense. SV fighting is now heavily reliant on shields, speed and maneuverability vs straight up Hardened Steel DPS soakers of the past. Another tip to consider is that the CPU usage of Carbon (1 CPU point per block) vs Hardened Steel (5 CPU per block). We can now build larger, more agile ships by utilizing mainly Carbon or a checkered board patterned of Carbon/Hardened steel as referenced below.
Thruster Placement
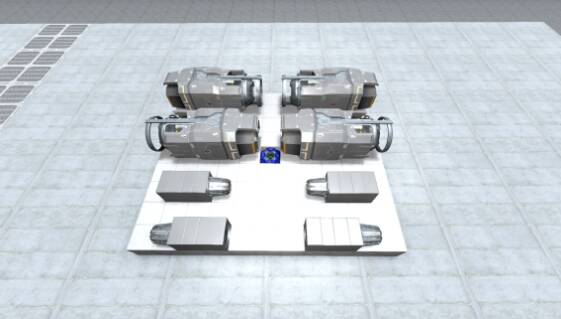
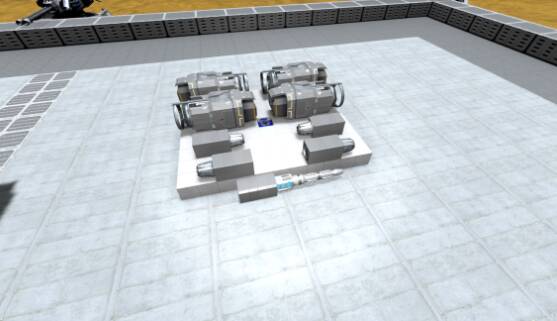
With the new explosion damage, it is absolutely imperative that you use the right combination of thrusters and they must also be placed properly. Long gone are the days when you could stack thrusters for armor and not be penalized by weight/CPU andexplosion radius damage. Below is a screenshot of what is no longer meta in today’s HWS PVP SV fighting.
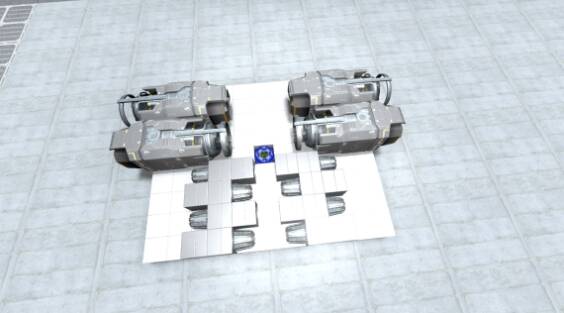
If your thrusters are placed like this and one is destroyed, the entire pack will chain react and explode because of how volatile the explosion damage radius is at the moment. What you want to do is leave at least 1 block between thrusters to mitigate the explosion damage as referenced below. This will give you substantially increased longevity.
Devices
The next section we will be discussing is devices. These will be your Ammo Boxes, Generators and Fuel Tanks. We always lean towards using the Small Generators and Small Fuel Tanks vs the larger ones. This being that the smaller units are only 1x1 vs the larger units at 1X2. This will make the target radius smaller and also the explosion radius smaller vs the larger ones.
We like to have at least 12-14 Small Generators and 6-8 Small Fuel Tanks. This will typically yield 9.24 KPU - 10.8 KPU. You can create different variants for more generators if you are building a base buster instead of a dogfighting SV. The Fuel Tanks will yield roughly 40-50 minutes of flight time at 1800 fuel capacity - 2400 fuel capacity.
Cockpit
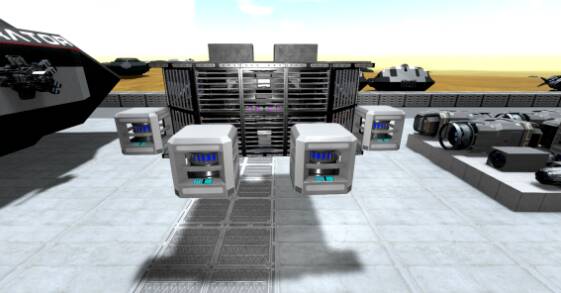
The most common cockpit is the top down cockpit for ingress/egress. The screenshot below serves as a guide on one way to set up a lag shot resistant cockpit. Remember, the goal is to
stay alive and mitigate lag shots.
Keep in mind that you should keep all targetable AWAY from your cockpit (at least 2-3 blocks). Redundancy is key. The screenshot below is an example of what NOT to do. Also, do not stack your Generators or Fuel Tanks adjacent, on top, or below each other. Another little trick is to remember that your Detector is TARGETABLE as a Mounted Weapon so you want to keep that away from your cockpit and critical devices as well (Generators/Fuel Tanks)
Lag Shots
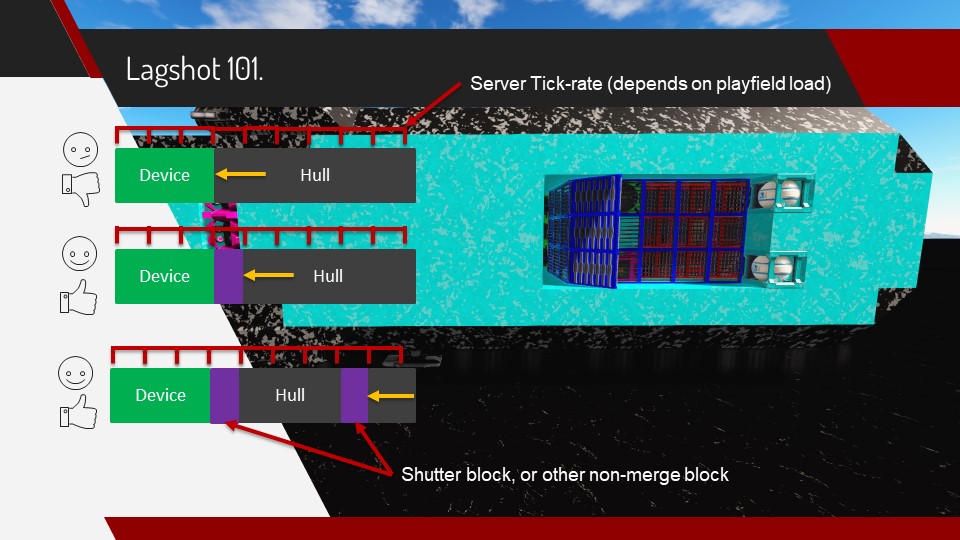
As most of you are aware, lag shots are real in this game. They have not been fixed and they can be devastating especially if there are large amounts of players/cores in the same playfield. An explanation of what lag shots are will be included in the main guide.
There are multiple ways to mitigate lag shots for SVs. Shutter blocks and Ramp blocks are the most common. The tried and true for HWS SV pilots has been Shutter blocks. But the downside of them is that they are heavy at 91 kg vs Hardened Steel Ramp blocks at 25.5 kg. Shutters also have 200 HP vs hardened steel ramp blocks at 159 HP.
Decoys and Targetable
A typical decoy used to mitigate turret targeting is the Laser Drill and also the Detector. The Laser Drill is the most efficient decoy at 800 HP and 380 CPU cost. Some players will run dumb fire rockets, but they are costly on your CPU at 1,050. Keep in mind when you place your decoys, you must turn them sideways or backwards so your ship will not pick them up on the weapon menu. The screenshot below illustrates.
When placing your targetable Generators, Laser Drills and Detector, make sure to not place them behind the cockpit because as your ship takes damage, the next closest device from the point of fire will be targeted by your enemy. For example, if you place Generators directly behind your cockpit, the volley will go right through your cockpit first before hitting those. We typically like to spread out our Generators as far as we can go with nothing in direct line of sight to our Cockpits and critical components.
Free Blueprint Provided
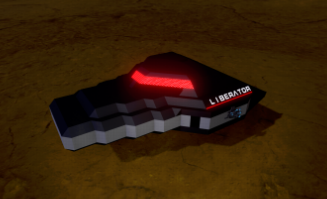
We are providing a combat tested SV that is very viable for today’s HWS SV PVP. It incorporates all of the strategies and design outlined in this guide. Please enjoy the newly built Liberator as it will immediately enable you to get out there and fight!
HWS_PVPGuide_Liberator.epb (6.1 KB)
The link below shows a video of the Liberator fighting and winning against one of the most meta SV designs known to HWS at this time. The opponent’s SV was masterfully designed by one of the very best and most experienced ABN PvP SV pilots on the server.

If you ever have any questions regarding additional tips and tricks, please reach out to us at any time and we would be more than happy to help you work through the details and provide additional insight.